Galileo Gen 2 Setup For Mac OSX
- Plug in everything - SD card (4GB or more) on which to load the IoT DevKit Image (needs to be the kind with a micro-SD card slide out bit) - Power cord...
Originally published on the rexstjohn.com blog
- nodejs
- intel-galileo
Originally published at rexstjohn.com on September 4, 2014. Recovered from the Internet Archive.
Galileo Gen 2

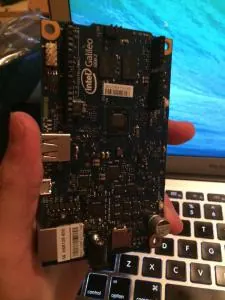
Step 1: Acquire Gen 2 Galileo board + Necessary Cables
- Plug in everything
- SD card (4GB or more) on which to load the IoT DevKit Image (needs to be the kind with a micro-SD card slide out bit)
- Power cord that comes with Gen 2
- Ethernet cable (If you are on a public network you will be better off using a USB, Ethernet converter)
- You don’t need the 6-pin USB cable or Micro-USB cable to connect XDK to Gen 2 Galileo.
Step 2: Prepare your IOT DevKit Image
- Download the IOT Kit SDK Image from Intel for Intel Galileo Gen 2
- Terminal stuff using your console…
- Bunzip your devkit: “bunzip2 iot-devkit-YYYYMMDDHHMM-mmcblkp0.direct.bz2“
- Insert your SD card (4GB is fine) and use the “diskutil list” command to discover it’s name (“diskN” or something like that)
- Unmount it: “diskutil unmountDisk /dev/diskN“
- Copy the image over to SD card: “sudo dd if=iot-devkit-YYYYMMDDHHMM-mmcblkp0.direct of=/dev/diskN bs=8m” (substitute the correct naming, use ‘tab’ to autofill the dev kit file name if you are using the console in the same directory for speed)
- Run the “sync” command in the terminal
- Insert the SDK card into your Intel Gen 2 and reboot it (one of the white buttons on the top which is marked with the words “reboot”)
Step 3: XDK Setup
Download and install Intel XDK, which will have an option for a Node.js project. Create an empty template project using the Node option.
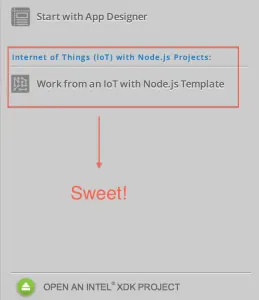
If your XDK instance does not have the IoT DevKit template, do this:
- Modify “/Applications/Intel\ XDK.app/Contents/MacOS/xdk.sh” to add the cheat code: ***“-client:projects-create-list:enableIoT”***Close it once you have done this.
- When you start XDK now, you should see the following option available now:
Step 4: Discover Galileo via the network + access it with a terminal
-
Download Bonjour Browser: <http://www.tildesoft.com>
-
Look for the listing which says: “_xdk-app-daemon._tcp”
-
Find the IP address under that for “quark,” we will use this for SSH purposes
-
Using the console do: “ssh root@10.0.1.11” to access the Yocto instance (replace the IP address with the one you discover from Bonjour as above)
Note: Node.js stuff is located under /node_app_slot
If you can’t get a terminal, try reseting it and hitting the refresh button on bonjour browser. Ethernet must be plugged into the Gen 2 board as well, haven’t yet found how to get a terminal with no Ethernet.
Step 5: Connect the board to XDK
-
You should be able to see your device listed in a drop down in your new Node.js template project
-
Make sure to reveal the Node output window to see what is going on by clicking the drawer button in the lower right hand corner
Step 6: Configuring your board with Node.js via XDK
-
Click the white “settings” button
-
The guides recommend hitting “Sync PC time w/clock” to synchronize the board and your PC
-
Renamed the board using “set IOT device name / alias”
-
Enable the NPM Install and “clean” settings to ensure that new node modules added to your package are installed on the board itself on deploy
Step 6: A Basic Node.js Application
Copy this into Main.js and then click the “Install / Build” button:
var http = require(‘http’);
http.createServer(function (req, res) {
res.writeHead(200, {‘Content-Type': ‘text/plain’});
res.end(‘Hello World\n’);}).listen(1337);
console.log(‘Server running at http://127.0.0.1:1337/’);
Now, on your regular terminal, try doing this: “curl 10.0.1.11:1337”
The result should be “Hello World.”
Step 7: Using the provided Ethernet -> USB Adapters
If you have been given a USB to Ethernet adapter, you may need to install the driver which ships on the device. Open “Finder” and find the listing for the device. Inside, there should be a “.pkg” file like this:
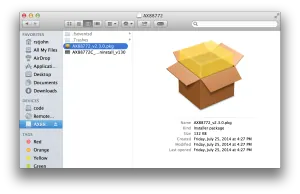
Double click and install the driver then restart your computer and it should work (e.g. discoverable with Bonjour app) provided you connect the adapter to the Galileo Gen 2 via an ethernet cable.
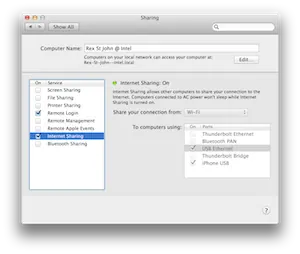
Note: you must also properly configure Internet sharing to include USB Ethernet: