Intel Edison El Capitan Setup Process
El Capitan requires a different set of instructions to setup with Intel Edison. This guide walks you through the setup process.
Originally published on the rexstjohn.com blog
- intel-edison
- ruby
Originally published at rexstjohn.com on January 8, 2016. Recovered from the Internet Archive.
El Capitan requires a different set of instructions to setup with Intel Edison. This guide walks you through the setup process.
Before you start:
- BOTH Micro-USB from your Edison must be plugged into your Mac
- These instructions will work specifically for El Capitan, not Yosemite
- Download the latest Intel Edison image from software.intel.com (Scroll down, select the Yocto complete image download, skip the integrated installer)
Instructions:
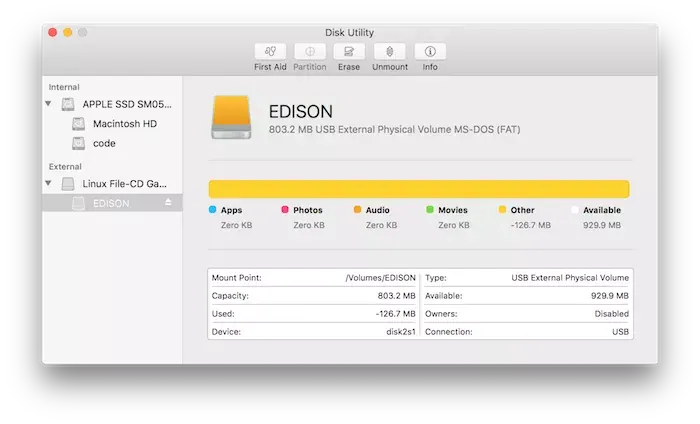
First, open Spotlight (“Command + Space Bar”) and type “Disk Utility” to open the Disk Utility. If you have both your USB cables plugged in, you will see an EDISON listing.
Next, select your EDISON listing and click the “Erase” button at the top.
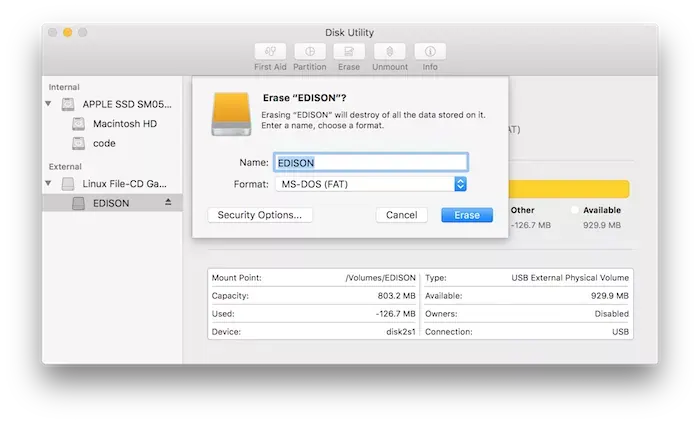
Under the “Erase” menu, click the “Format” button and select MS-DOS (FAT) as below.
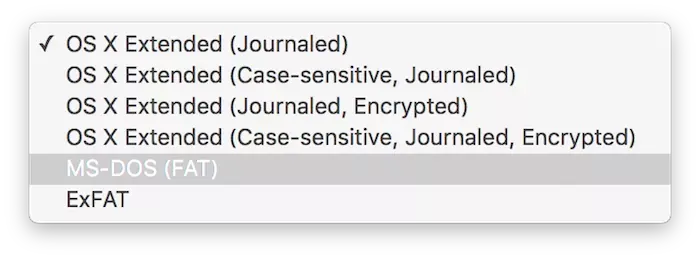
Now click “Erase.” After some time, your Edison will be partitioned and erased correctly. Now we need to flash the board.
Running flashall.sh
Download and unzip the Yocto complete image from software.intel.com (again, skip the integrated installer).
Open “Terminal” (Command + Space Bar and type “Terminal” to use Spotlight). Navigate via BASH to the folder where you unzipped the Yocto complete image.
If you don’t have HomeBrew on your machine, run this command. You may need to add “sudo” before these commands to make this work.
ruby -e "$(curl -fsSL https://raw.githubusercontent.com/Homebrew/install/master/install)"
brew install dfu-util coreutils gnu-getopt
You also need to install lsusb for OS X: LSUSB for Mac install instructions
Now run the flashall.sh script located in the Yocto image folder:
./flashall.sh
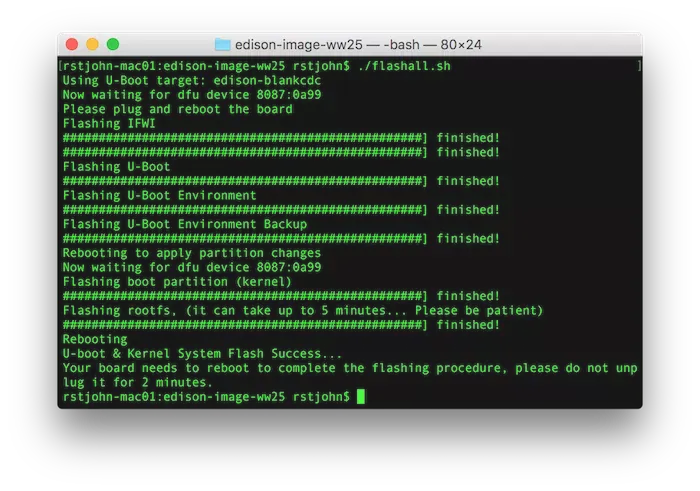
Now your Edison is flashed!