Sharing Wi-Fi with a Gen 2 Galileo Board via USB
Follow these steps to share Wi-Fi from your laptop with your Galileo Gen 2 board.
Originally published on the rexstjohn.com blog
Tags
- intel-galileo
Originally published at rexstjohn.com on August 22, 2014. Recovered from the Internet Archive.
Follow these steps to share Wi-Fi from your laptop with your Galileo Gen 2 board.
You will need the following:
- Standard ethernet cable
- Laptop connected to Wi-Fi internet
- USB to Ethernet adapter
- Bonjour Browser
- Intel Galileo Gen 2 + proper SD card loaded with necessary software (provided by Intel)
Here is how to do it:
- Step 1: Download + Install Intel XDK
- Step 2: Download and install Bonjour Browser
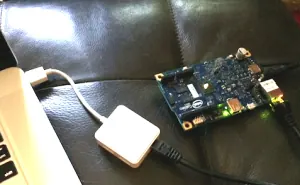
- Step 3: Power on your Gen 2 board and connect it to your PC’s USB slot via the ethernet -> USB adapter like this (make sure you have the Yocto linux loaded SD card in the slot)
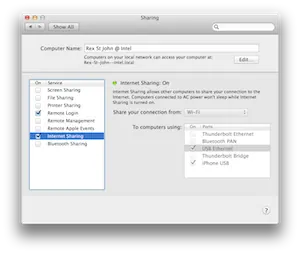
- Step 4: Open System Preferences -> Sharing and select “Internet Sharing.” Before turning it on, make sure to have enabled “USB Ethernet” checkbox.
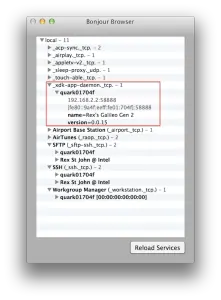
- Step 5: Discover your connected Galileo device’s IP address using the Bonjour Browser (listed under “xdk-app-daemon”)
- Step 6: SSH into your Galileo and prove it has internet:
ssh root@your.ip.here.from.bonjour
Simply make some call like “ping google.com” to see if you get a real internet response back.